What high-gloss paint correction actually produces
Most owners schedule paint correction because they want the scratches and swirl marks gone. That is a reasonable goal, but it understates what the process actually does when it is performed correctly. A thorough paint correction does not just remove surface defects. It restores the geometric uniformity of the clear coat surface, and that change in surface geometry is the physical reason the paint looks dramatically deeper and more reflective afterward. The two outcomes — defect removal and gloss improvement — come from the same mechanism, and understanding that mechanism helps owners set realistic expectations before the work begins.
Texas conditions make this especially relevant for North Houston vehicles. UV radiation, construction dust, iron fallout from highway traffic, and the friction of a tunnel wash brush all contribute to a clear coat that is microscopically uneven after a few years of normal use. The light that hits a degraded surface scatters in multiple directions instead of reflecting cleanly back to the observer’s eye. That scattered light is what you perceive as dullness, haziness, or what some people call a lack of depth. Paint correction, at its core, is the process of leveling that surface so reflection becomes directional again.
What the clear coat is doing optically
Factory clear coat is applied in liquid form and cures to a hard, transparent layer typically between 40 and 60 microns thick on most production vehicles. In ideal condition, its surface is flat enough at the microscopic level to act almost like a mirror. That is where the gloss comes from. It has nothing to do with the color layer underneath and almost nothing to do with any product applied on top. The geometry of the clear coat surface itself determines how much light reflects specularly versus scatters diffusely.
When a brush wash drags grit across the panel or a parking lot incident leaves a light scratch, the clear coat surface develops ridges, valleys, and irregular peaks. Each imperfection deflects a portion of incoming light away from the angle your eye is viewing from. The more defects present, the more diffuse the reflection and the flatter the paint appears. Swirl marks are particularly damaging to perceived gloss because they are distributed across the entire panel surface rather than being isolated damage points.
This is also why clean paint under direct sunlight looks far worse than it does in shade. Direct sun comes from a consistent angle and reveals the scatter pattern across every panel simultaneously. Shade provides ambient, diffuse illumination that does not expose directional reflection flaws as clearly. Inspecting paint correction results should always be done under a focused light source, not in a shaded bay.
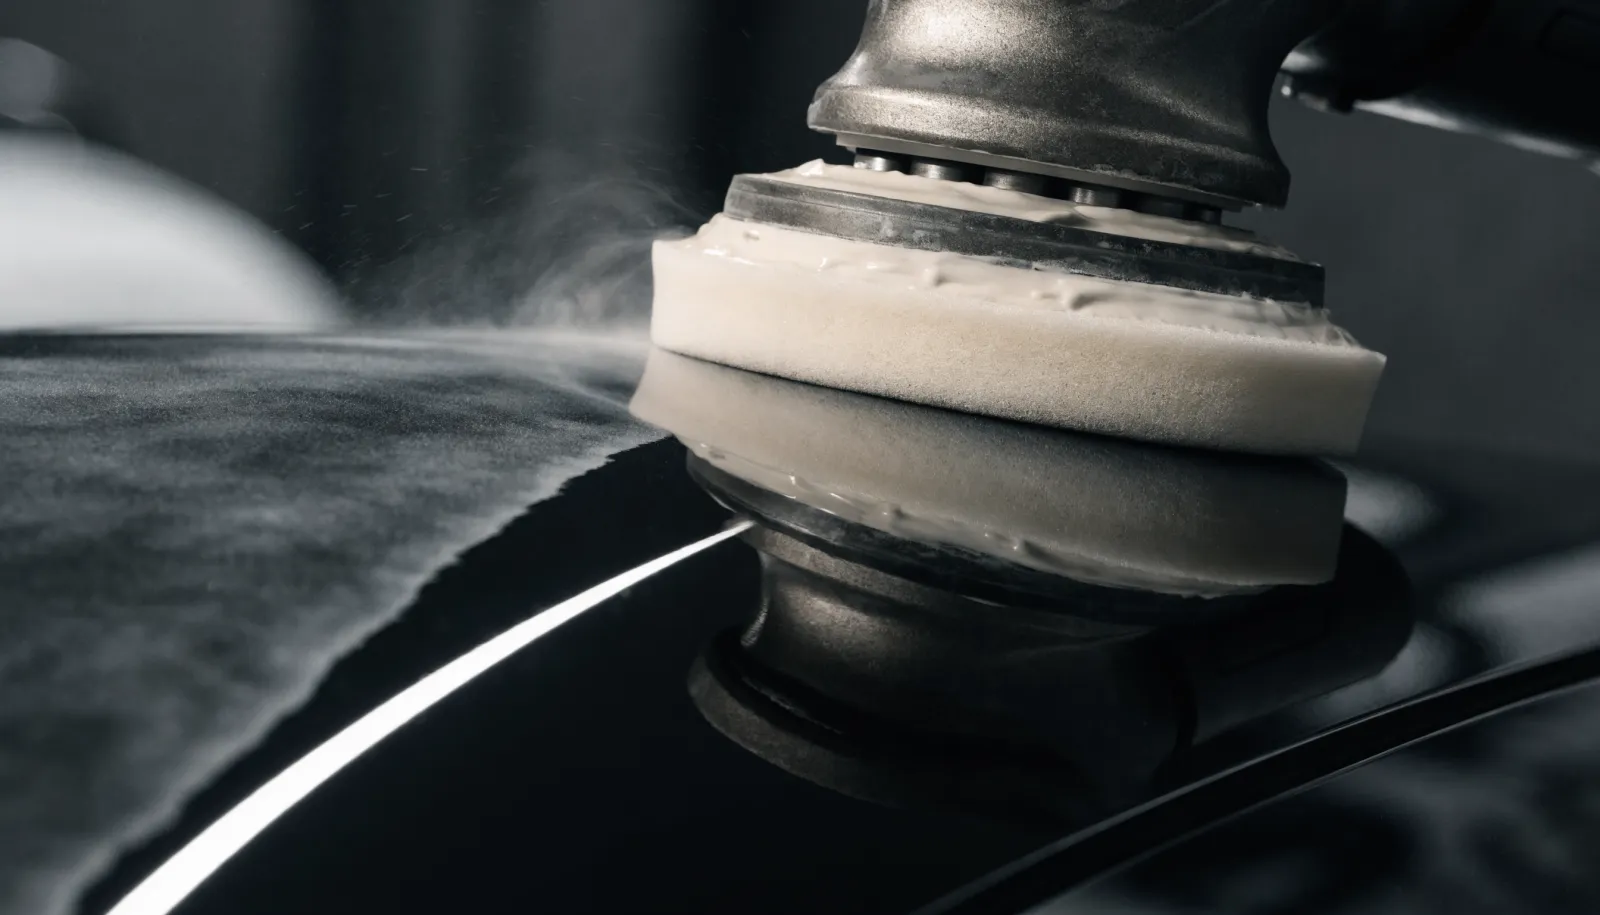
How machine polishing levels the surface
Paint correction uses an abrasive compound or polish carried by a foam or microfiber pad on a dual-action or rotary machine. The abrasive particles cut into the peaks of the damaged clear coat surface, gradually reducing them until the surrounding valley floor is reached. When done correctly, the result is a flat surface at a lower overall depth than you started with, but one that reflects light cleanly again.
The selection of abrasive cut, pad type, machine speed, and working pressure determines both how much clear coat is removed and what surface finish remains. A compound that cuts aggressively will level deep scratches more quickly but leaves its own fine marring that a finishing polish must then remove. A finishing polish alone may not be able to reach the bottom of a deeper scratch. Matching the process to the severity of the defects and the hardness of the specific clear coat is the part of the work that requires genuine experience. There is no universal combination of pad and compound that works optimally across every vehicle.
This is one reason paint thickness measurement matters before any correction work begins. A vehicle with 40 microns of clear coat remaining has less margin for aggressive compounding than one with 60. Removing 5 microns during a heavy cut on a thin panel can create problems that cannot be undone. A responsible shop measures before they polish, not after. You can read more about how that preparation step fits into a broader paint correction process at EuroLuxe.
The role of decontamination and prep
Gloss improvement from polishing is directly limited by what is happening at the surface before the pad touches the paint. Iron particles embedded in the clear coat, tar deposits, and bonded industrial fallout all interfere with pad contact and introduce contamination into the polishing process. If the surface has not been properly decontaminated, the abrasive is not working against clear coat — it is working against contamination embedded in it, which produces uneven results and can introduce additional marring.
Proper prep involves a foam pre-wash, a hand wash, a chemical iron decontamination step, and typically a clay bar or clay mitt treatment before the machine comes out. This sequence ensures the pad is contacting clean, bare clear coat and that the abrasive is cutting the surface rather than rolling contamination particles across it. Skipping or abbreviating these steps produces a finished result that looks acceptable under casual inspection but does not hold up under direct light. Panels that were not fully decontaminated will often still show micro-marring or a faint haze that a trained eye catches immediately.
Single-stage versus multi-stage correction
A single-stage correction uses one compound-and-polish combination, often a product that contains both cutting and finishing properties in a single formulation. It handles light to moderate swirl marks and fine scratches reasonably well and is appropriate for vehicles that have been reasonably maintained. The process removes less material and takes less time, which keeps the cost lower.
A multi-stage correction uses a sequence of progressively finer abrasives. The first stage may use a heavy compound to cut down deep scratches or oxidation. The second stage refines the surface the compound left behind. A third finishing stage removes the remaining micro-marring from earlier steps and brings the surface to its maximum reflective clarity. Each stage adds time and labor, but the cumulative result on a heavily defected panel is substantially better than a single pass can achieve.
Not every vehicle needs a multi-stage process. A newer vehicle with light swirling from improper washing typically responds well to a single refined polishing stage. An older vehicle that has been through years of automatic washes, outdoor storage, or a previous amateur correction attempt will almost always require the heavier work to reach a genuinely corrected result. Assessing which approach is appropriate requires examining the paint under focused lighting before writing an estimate. If a shop quotes the work without looking at the car under a light, take that as information.
What correction cannot fix
Paint correction works within the clear coat layer. Any damage that has penetrated through the clear into the color coat or primer — a scratch that shows a different color at its base, a deep keying mark, a stone chip that reveals gray or white primer — cannot be leveled by polishing. Those defects require paint touch-up or panel refinishing.
Similarly, correction cannot restore clear coat that has already failed. Clear coat failure presents as dull, chalky, or peeling areas where the clear has delaminated from the color coat beneath it. Once the clear has broken down at the molecular level from UV exposure, there is no surface to polish. The panel requires professional repainting. A shop that claims polishing will fix failing clear coat is either mistaken or not being straight with you.
If the goal after correction is to maintain the results long-term, a protective layer helps significantly. A ceramic coating applied over a fully corrected surface locks in the gloss and provides a chemically resistant layer that is easier to wash without reintroducing swirl marks. The coating does not improve on poorly corrected paint, but over properly prepared clear coat it extends the period before the next correction is needed substantially.
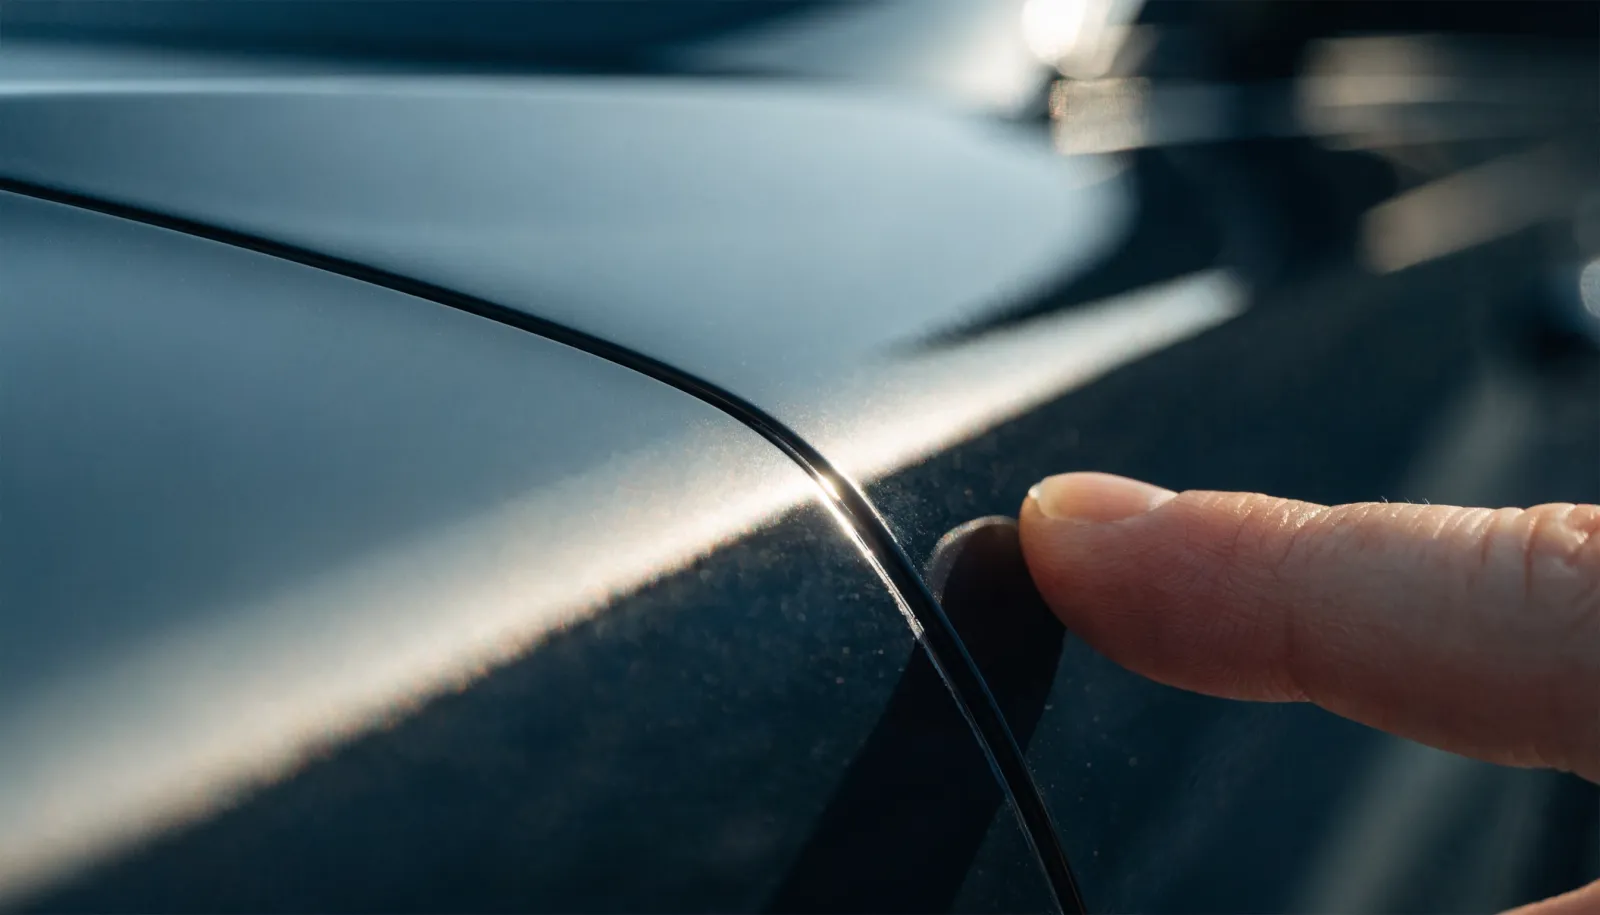
What to look for in a finished result
After a proper paint correction, the clearest indicator of quality work is how the paint behaves under a focused single-point light source. The reflection should be sharp and undistorted with no haze, orange-peel-like scatter, or visible swirl pattern. Edges and body lines should produce crisp reflections rather than soft, blurred ones. Viewed straight on, deep colors like black, dark blue, and red should appear almost wet without any product applied to them.
If the result looks good in overcast light or from a distance but loses clarity when you move a light across the panel at close range, the finishing stage was not completed properly or the decontamination step was skipped. A shop that does the work correctly should be comfortable showing the results under the harshest lighting available, not just in the shade of the parking lot.
Anyone in the Tomball, The Woodlands, Spring, Cypress, or broader North Houston area who wants to talk through what their specific paint situation requires can reach EuroLuxe Detailing at (346) 920-4372 before committing to anything.
Paint correction is one of the more technically demanding services in the detailing trade because the margin for error is the thickness of the clear coat itself. Done with proper prep, appropriate abrasive selection, and thorough finishing, the result is paint that reflects the way it was designed to when it left the factory — or in many cases, better than it ever looked during the delivery lot inspection.